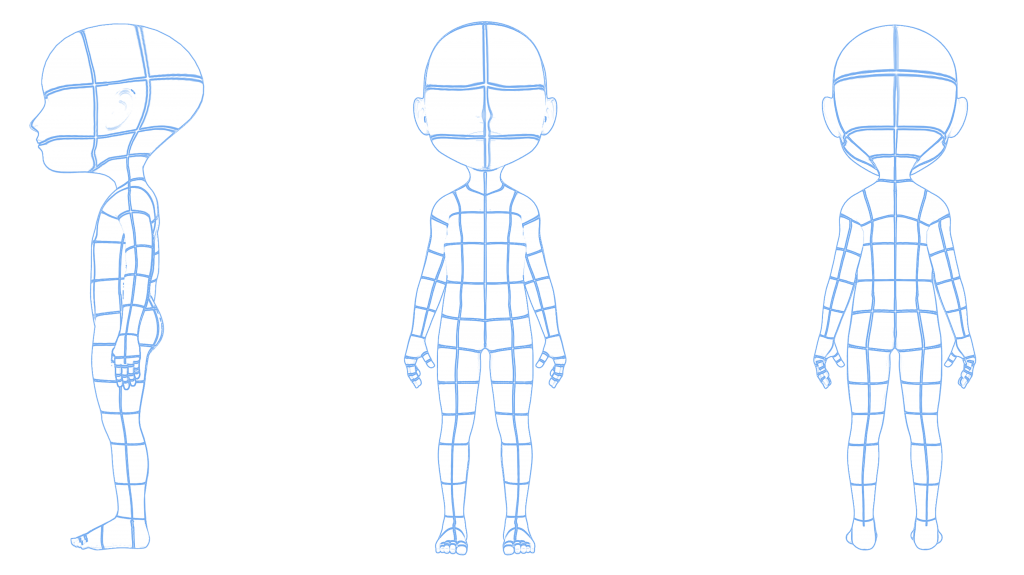
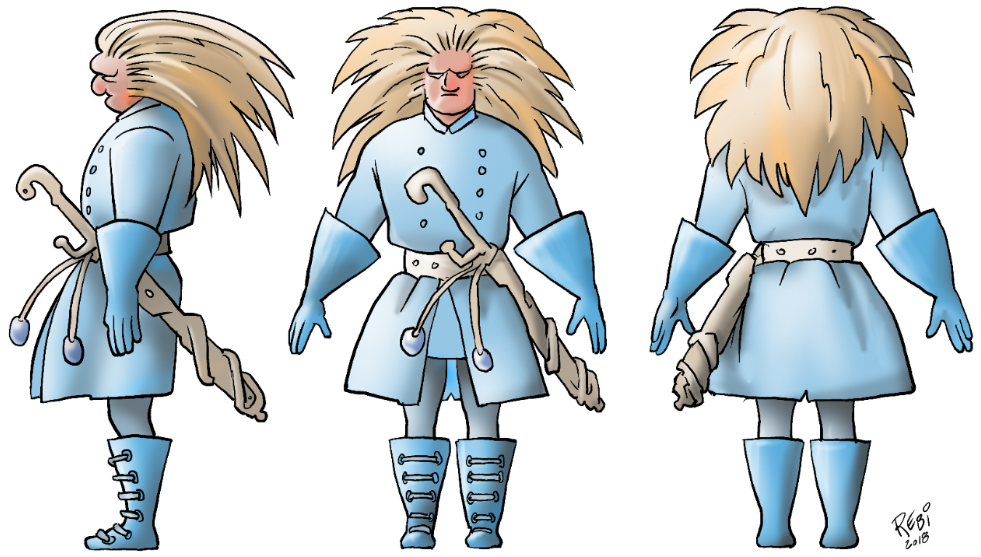
This dsicription is an continuation of the blog Character design tutorial 1
![farvelægning Photoshop karakterdesign illustration Rene Birkholm alias rebi tegneren.dk danmark fyn odense](http://tegneren.dk/wp-content/uploads/2018/10/Screen-Shot-2018-10-09-at-15.16.17.png)
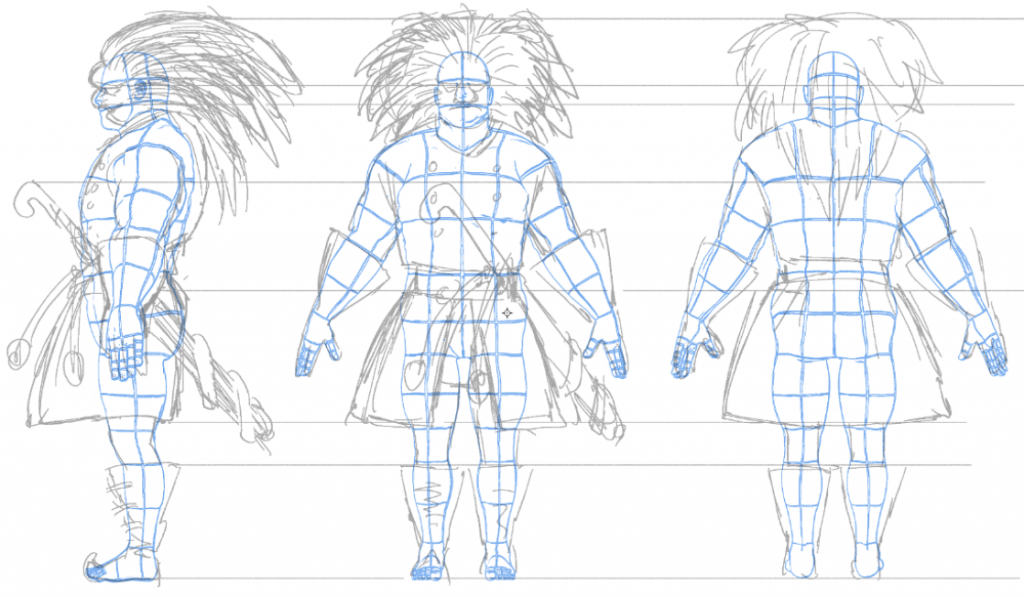
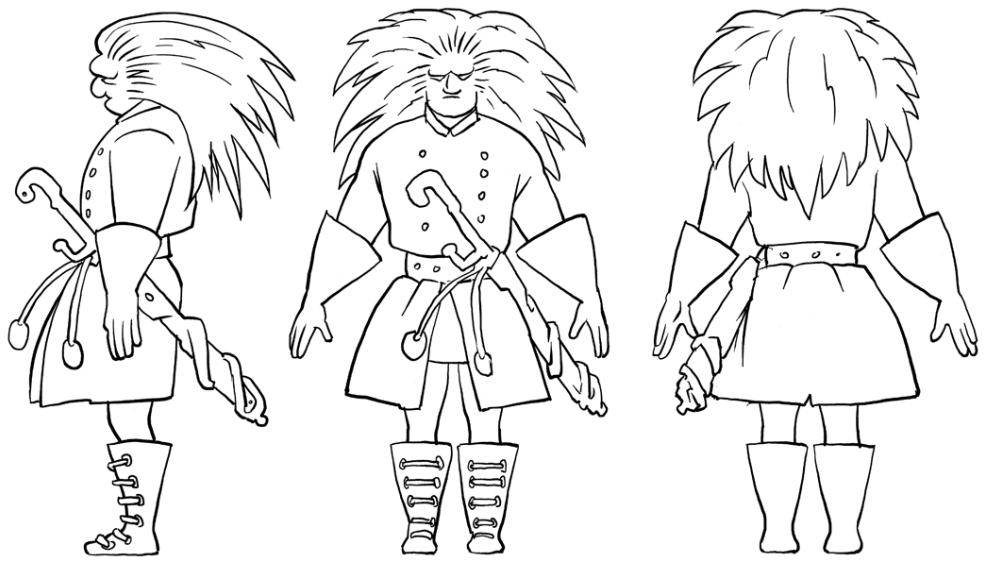
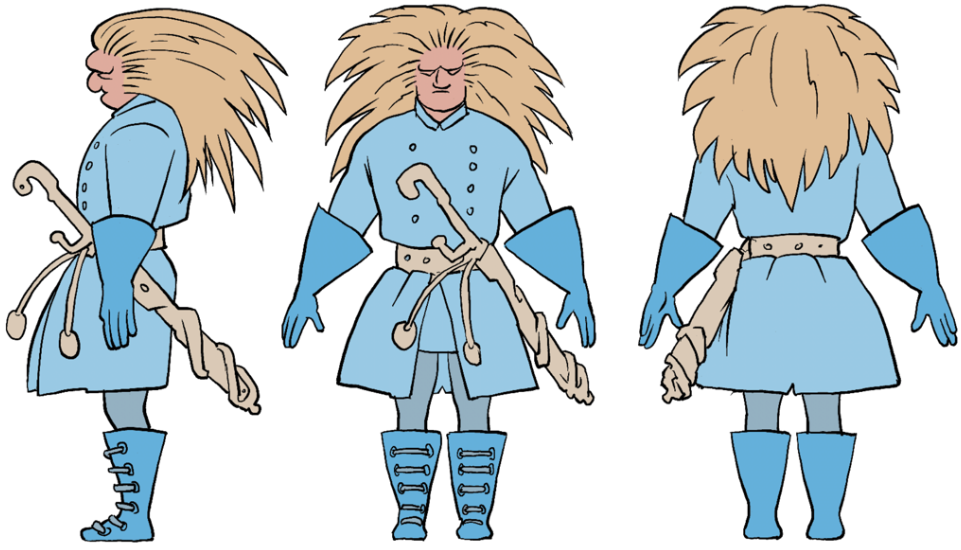
In the last tutorial we made this character drawing and scanned it into the computer. Now open it in Photoshop.
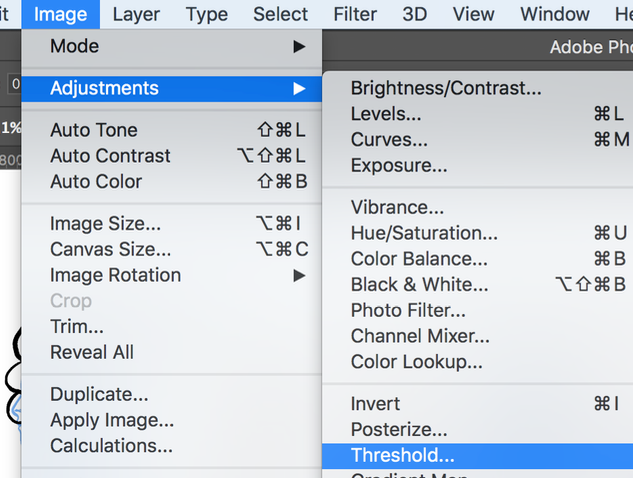
![farvelægning Photoshop karakterdesign illustration Rene Birkholm alias rebi tegneren.dk danmark fyn odense](http://tegneren.dk/wp-content/uploads/2018/10/Screen-Shot-2018-10-09-at-15.17.11.png)
Open Threshold
![farvelægning Photoshop karakterdesign illustration Rene Birkholm alias rebi tegneren.dk danmark fyn odense](http://tegneren.dk/wp-content/uploads/2018/10/Screen-Shot-2018-10-09-at-15.17.23.png)
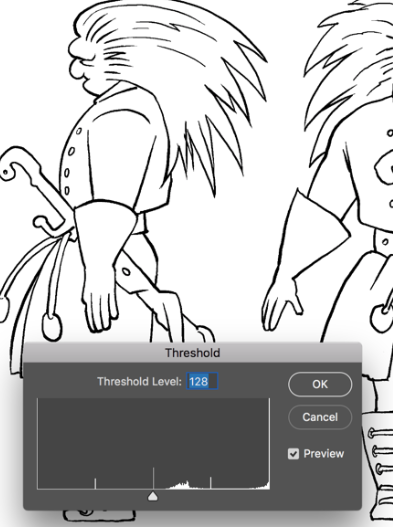
Adjust to make the blue disappear.
![farvelægning Photoshop karakterdesign illustration Rene Birkholm alias rebi tegneren.dk danmark fyn odense](http://tegneren.dk/wp-content/uploads/2018/10/Screen-Shot-2018-10-09-at-15.17.43.png)
The blue is gone.
![farvelægning Photoshop karakterdesign illustration Rene Birkholm alias rebi tegneren.dk danmark fyn odense](http://tegneren.dk/wp-content/uploads/2018/10/Screen-Shot-2018-10-09-at-15.17.59.png)
Double click the background layer …
![farvelægning Photoshop karakterdesign illustration Rene Birkholm alias rebi tegneren.dk danmark fyn odense](http://tegneren.dk/wp-content/uploads/2018/10/Screen-Shot-2018-10-09-at-15.18.10.png)
… and click ok …
![farvelægning Photoshop karakterdesign illustration Rene Birkholm alias rebi tegneren.dk danmark fyn odense](http://tegneren.dk/wp-content/uploads/2018/10/Screen-Shot-2018-10-09-at-15.18.20.png)
… to change it to a normal layer (with many more options)
![farvelægning Photoshop karakterdesign illustration Rene Birkholm alias rebi tegneren.dk danmark fyn odense](http://tegneren.dk/wp-content/uploads/2018/10/Screen-Shot-2018-10-09-at-15.18.31.png)
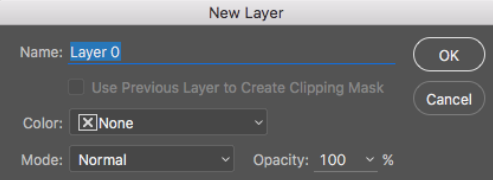
Make a new empty layer
![farvelægning Photoshop karakterdesign illustration Rene Birkholm alias rebi tegneren.dk danmark fyn odense](http://tegneren.dk/wp-content/uploads/2018/10/Screen-Shot-2018-10-09-at-15.18.40.png)
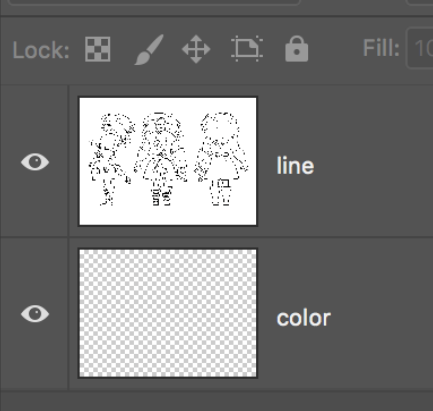
Place it below the line-art layer. Call the layers line and color.
![farvelægning Photoshop karakterdesign illustration Rene Birkholm alias rebi tegneren.dk danmark fyn odense](http://tegneren.dk/wp-content/uploads/2018/10/Screen-Shot-2018-10-09-at-15.18.51.png)
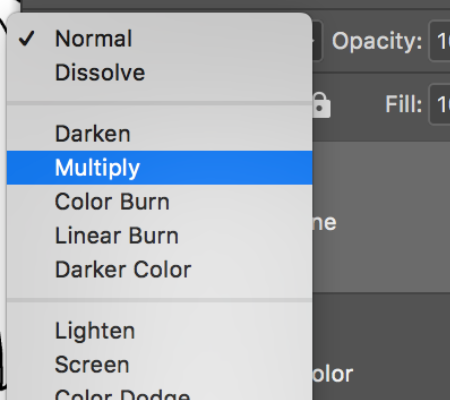
Change the blending mode for the line layer to multiply.
![farvelægning Photoshop karakterdesign illustration Rene Birkholm alias rebi tegneren.dk danmark fyn odense](http://tegneren.dk/wp-content/uploads/2018/10/Screen-Shot-2018-10-09-at-16.26.39.png)
![farvelægning Photoshop karakterdesign illustration Rene Birkholm alias rebi tegneren.dk danmark fyn odense](http://tegneren.dk/wp-content/uploads/2018/10/Screen-Shot-2018-10-09-at-16.31.39.png)
Lock the line layer.
![farvelægning Photoshop karakterdesign illustration Rene Birkholm alias rebi tegneren.dk danmark fyn odense](http://tegneren.dk/wp-content/uploads/2018/10/Screen-Shot-2018-10-09-at-15.19.15.png)
Now we are going to add colors. The white paper background of the “line” layer is transparent because it’s in multiply-mode:)
![farvelægning Photoshop karakterdesign illustration Rene Birkholm alias rebi tegneren.dk danmark fyn odense](http://tegneren.dk/wp-content/uploads/2018/10/Screen-Shot-2018-10-09-at-15.19.36.png)
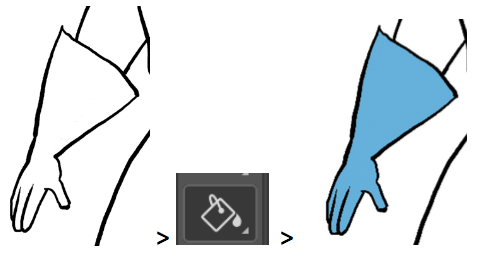
If there are no gaps in the line-art use the paint bucket to add color.
Else use a pencil or brush
![farvelægning Photoshop karakterdesign illustration Rene Birkholm alias rebi tegneren.dk danmark fyn odense](http://tegneren.dk/wp-content/uploads/2018/10/Screen-Shot-2018-10-09-at-15.19.55.png)
Select the magic wand tool
![farvelægning Photoshop karakterdesign illustration Rene Birkholm alias rebi tegneren.dk danmark fyn odense](http://tegneren.dk/wp-content/uploads/2018/10/Screen-Shot-2018-10-09-at-15.20.08.png)
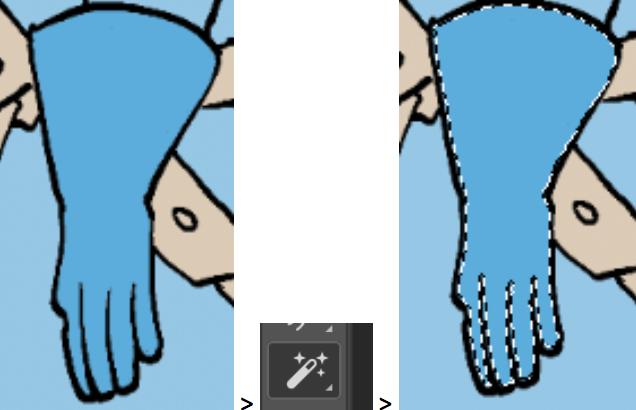
Select a colored element. Here the glove.
![farvelægning Photoshop karakterdesign illustration Rene Birkholm alias rebi tegneren.dk danmark fyn odense](http://tegneren.dk/wp-content/uploads/2018/10/Screen-Shot-2018-10-09-at-15.20.43.png)
Select the burn tool.
![farvelægning Photoshop karakterdesign illustration Rene Birkholm alias rebi tegneren.dk danmark fyn odense](http://tegneren.dk/wp-content/uploads/2018/10/Screen-Shot-2018-10-09-at-15.20.52.png)
Select a soft brush (0% hardness)
![farvelægning Photoshop karakterdesign illustration Rene Birkholm alias rebi tegneren.dk danmark fyn odense](http://tegneren.dk/wp-content/uploads/2018/10/Screen-Shot-2018-10-09-at-15.21.06.png)
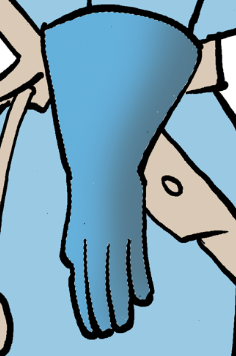
Make the right-side shadow dark with the burn tool.
![farvelægning Photoshop karakterdesign illustration Rene Birkholm alias rebi tegneren.dk danmark fyn odense](http://tegneren.dk/wp-content/uploads/2018/10/Screen-Shot-2018-10-09-at-15.21.24.png)
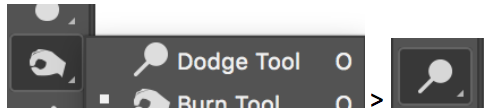
Select the Dodge Tool behind the burn tool.
![farvelægning Photoshop karakterdesign illustration Rene Birkholm alias rebi tegneren.dk danmark fyn odense](http://tegneren.dk/wp-content/uploads/2018/10/Screen-Shot-2018-10-09-at-15.21.34.png)
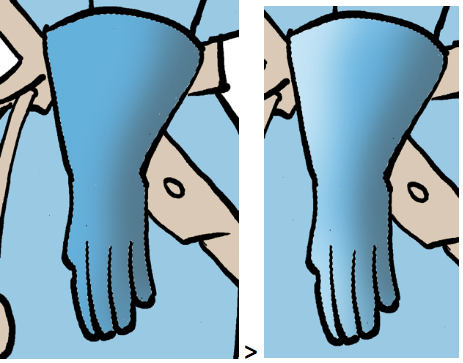
Use the Dodge tool to make the left-side light.
![farvelægning Photoshop karakterdesign illustration Rene Birkholm alias rebi tegneren.dk danmark fyn odense](http://tegneren.dk/wp-content/uploads/2018/10/Screen-Shot-2018-10-09-at-15.21.49.png)
Imagine the light coming from left creating a light and a dark side.
![farvelægning Photoshop karakterdesign illustration Rene Birkholm alias rebi tegneren.dk danmark fyn odense](http://tegneren.dk/wp-content/uploads/2018/10/Screen-Shot-2018-10-09-at-15.22.04.png)
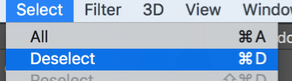
Deselect (Notice the shortcut for next time).
![farvelægning Photoshop karakterdesign illustration Rene Birkholm alias rebi tegneren.dk danmark fyn odense](http://tegneren.dk/wp-content/uploads/2018/10/Screen-Shot-2018-10-09-at-15.22.56.png)
Use this technique on all the parts of the drawing.
Done:)